Copper Spur Vs Duplex tent comparison
Battle of the Big Agnes Copper Spur Vs Duplex from Zpacks. This is my attempt to explain why I don’t think one is better than the other – boring right? 🙂
Let’s start at the begnning.
When I back in 2017 decided that I wanted to thru-hike The Pacific Crest Trail, I had never done any hiking that involved a tent, so I spent a ton of time online researching and trying to figure out what to get, and Big Agnes was one of the most popular ones – Zpacks was starting to get some tracktion but it just seemed too advanced and hipster for me to 🙂 and considering that I would have to order it from the US would just make it way to expensive at that time.
Big Agnes Copper Spur HV UL2
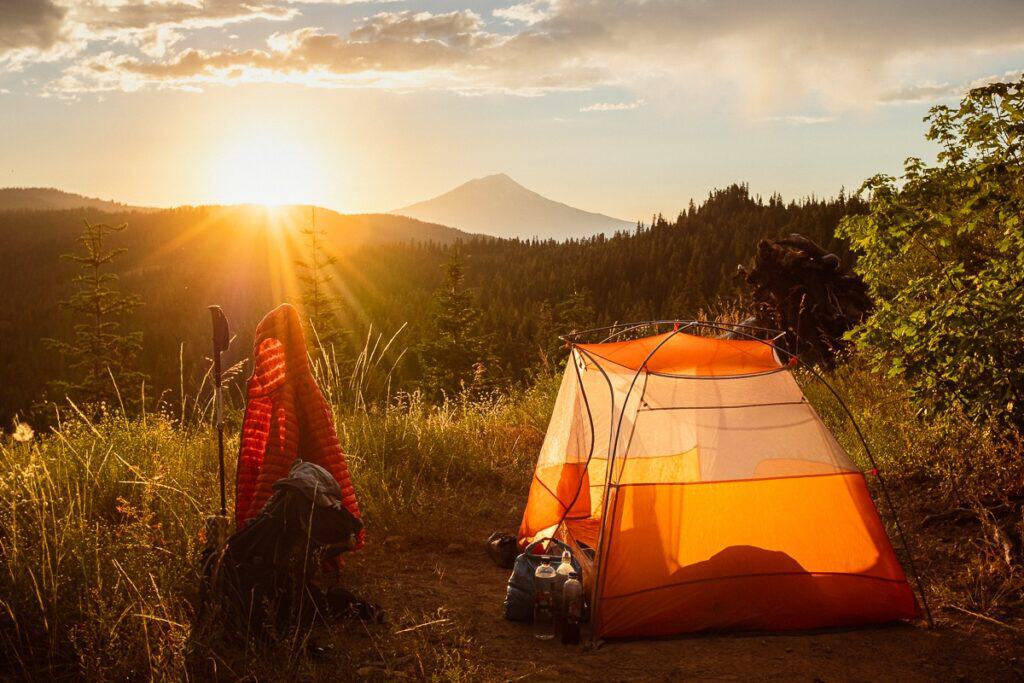
The reason that I went with the BA Copper Spur HV UL2 was that all reviews were very positive, it was pretty lightweight compared to “normal” tents and easy to set up and had the possibility to be free standning as well.
Let’s have a look at the specs shall we.
Big Agnes Copper Spur HV UL2 Specs:
3 lbs 1 oz / 1.4 kg packed weight
88 x 52 x 40 inches (L x W x H)
19.5 x 4 inch packed size
29 sq ft floor area
18 sq ft vestibule combined area
2 doors
3-season
Big Agnes has introduced a new version of the Copper Spur HV UL2 tent, so I had to dig around to find some specs for the 2017 model.
During my Thru-hike of the Pacific Crest I absolutely loved the Big Agnes Copper Spur HV UL2 tent, as you might have guessed I opted for the 2 person so I could fit my backpack inside the tent and just overall have more room – remember this was my first time having to live in a tent, so I had no idea what to expect, and better safe than sorry 🙂
The Big Agnes Copper Spur HV UL2 (now discontinued, but a bunch of new version are out – check it here) is amazing fast to set up and take down, and very roomy – I am just over 6″ (184cm) and had no problems with the length of the tent, but some nights I did end op with a moist sleeping bag as I had moved too much during the night so I was touching the tent wall.
The free standning really came in handy later on the hike, when I started to get lazy and didn’t want to use spikes 🙂 and it even has a clip system so the rain fly can be used without using spikes.
Another amazing thing is the option to not use the rain fly and lie in your tent at enjoy the night sky – and when its too hot it is also a nice option. So all in all I was very happy with my decision.
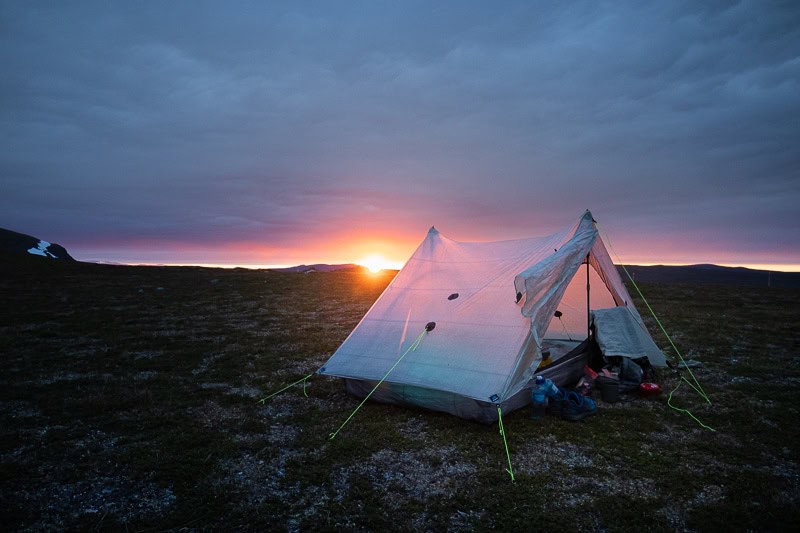
Zpacks Duplex
After having completed the Pacific Crest trail I knew my limits and what I was able to endure, so I started to try and dial in my hiking gear even more so I could shred som weight and the tent was one of the big places to save weight which I why I went for the Zpacks Duplex.
Reason I went for the Zpacks Duplex and not a Plexamid or another 1 person tent, was that I just loved the space I my Big Agnes tent, so I wasn’t about to give up on that – and on the PCT I saw a lot of people in 1 person Zpacks tents and they are barely able to fit 🙂
Zpacks Duplex Specs:
Weight:
19.4 ounces (550 grams) including guy lines, sewn in linelocs, taped seams, and a stuff sack. A piece of repair tape is included with the tent.
*8x Stakes are required but are not included. We have a variety of Ultralight Stakes to choose from.
Exterior Dimensions:
Peak height: 48″ (122 cm)
Ridgeline width: 53″ (135 cm)
Width including vestibules: 86.5″ (220 cm)
Vestibule space: 20.75″ (53 cm) depth on each side
Length: 100″ (254 cm)
Interior Dimensions:
Peak height: 48″ (122 cm)
Floor width: 45″ (114 cm)
Floor length: 7.5 feet (2.3 meters)
Zipper entry height: 36″ (91 cm)
Packed Dimensions:
7″ diameter by 13″ tall (18 cm x 33 cm) / 520 cubic inches (8.5L)
I used the Zpacks Duplex on my thru-hike of Kungsleden (King’s Way) and I really enjoyed it.
it needs 8 spikes, so it is not as fast or easy to set up as the Big Agnes Copper Spur HV UL2, but its not too bad once you have done it a few times.
What I really like about the Zpacks Duplex is the weight – 19.4 ounces (550 grams) for a 2 person tent is just crazy, and since it is made of Dyneema Composite Fabric, it is waterproof and doesn’t need a rain fly.
It also needs 2 poles to hold up the tent, which is not a problem for people who use trekking poles while hiking, but if you don’t use trekking poles, it is probably a nuisance to have to carry that as well (but then again, compared to carrying the poles for the Big Agnes its not much different). But trekking poles are awesome so why aren’t you using those?! 🙂
My “Big” problem
My biggest problem, but something you just have to learn to live with, is condensation – on Kungsleden (King’s Way) I probably only had a day or two without condensation, rest of the time the tent is wet on the inside, and if you’re too close to the wall you will have a moist/wet sleeping bag 🙂
On the Arizona Trail I think I had condensation every morning so I started to sleep diagonal instead to get the most floor space and I either had to dry my tent off, wait for the sun to dry it, or pack it down wet, and take it out during lunchtime to let the sun dry it off (which is a nice way to optimise your time anyways)
As you can tell there probably are more negatives with the Zpacks Duplex compared to the Big Agnes Copper Spur HV UL2, but the weight savings are almost 2,2 lbs (1kg) which for me makes up for the condensation – which actually is the only downside, oh and the fact that you can’t watch the night sky from inside your Zpacks Duplex Tent.
Conclusion – but not conclusion
Depending on your needs and your budget I don’t think you can go wrong with any of these tents – I had no problems carrying the Big Agnes tents on my PCT thruhike and have no regrets that I didn’t choose the Zpacks instead (I do plan on using my Zpacks Duplex on my CDT thru-hike though).
Quality wise I can only really speak on behalf of the Big Agnes which helt up with out any problems during my PCT thru-hike, and I would probably guess that it could handle another thru-hike. My Zpacks has only done about 700 miles (1100 km) so far, so I feel that its too early to talk about durability, but so far so good.
So if you’re like me back in 2017, and starting out on hiking gear, I would probably recommend the Big Agnes as it is about 150$ cheaper and is the perfect way to start tenting (is that a word?).
But if you’re like me and got sucked into the ultralight trap, the Zpacks is the way to go 🙂
Ohh and regarding packability, the Zpacks Duplex does win as it can pack down pretty small, whereas the Big Agnes does take up more space, and the included poles also take up some space. The Zpacks Duplex uses your trekking poles.
As always, if you have any questions I will try my best to answer them!
/Boss
The UGQ XL-Bandit Quilt
Like I wrote in an earlier blog post I decided once again to upgrade my quilt to a warmer one, just to make sure that I wouldn’t get cold on my hike across Scotland (which I never actually did because of COVID-19).
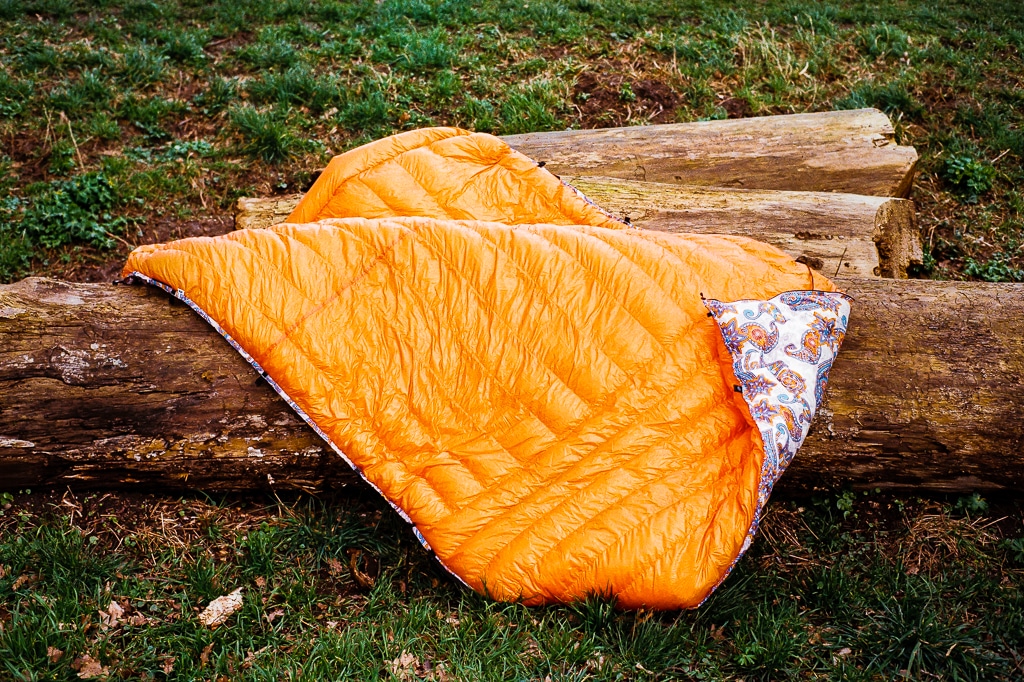
So I ordered The UGQ XL-Bandit Quilt.
These are just my first impressions of The UGQ XL-Bandit Quilt, as I haven’t used it properly yet so I will do an update when I get back from my Thruhike of the Arizona Trail and The great outdoors Challenge (TGO Challenge).
The quilt specs
Let’s have a look at the specs:
- Fill Power: 950
- Temperature Rating: 10*F/-12*C
- Width: 60″ (152cm)
- Length: 78″ (198cm)
- Inner Shell Color: M10 BLAZE ORANGE
- Outer Shell Fabric: OD-INK FABRICS
- OUTDOORINK® Outer Shell Pattern: PAISLEY-1
- Taper Style: FULL TAPER
- Draft Collar – Neck Line: YES PLEASE
- Foot Box Style: ZIPPER & DRAW CORD
- Dynamic Tension Control: YES PLEASE
- Pad Attachment Options: DELUXE
- Weight: 28 oz (794 gram)
I decided to go for the 950 fill power because it means that I can pack the quilt down to a smaller size (higher fill power means that the down quality is better and more fluffy so less down is needed to reach the desired temperature rating) and it saves weight (but that’s just crazy talk as it saved me 0.48oz/13g going from 850 to 950 fill power).
I toss and turn when I sleep so going for the XL-Bandit instead of the normal Bandit version made more sense, because I could get the 60″ (152cm) width. That should give me more room to move around and still keep the quilt from sliding up and creating draft.
Apart from getting rave reviews online, the other big reason I went with the UGQ brand was the color/pattern options 🙂
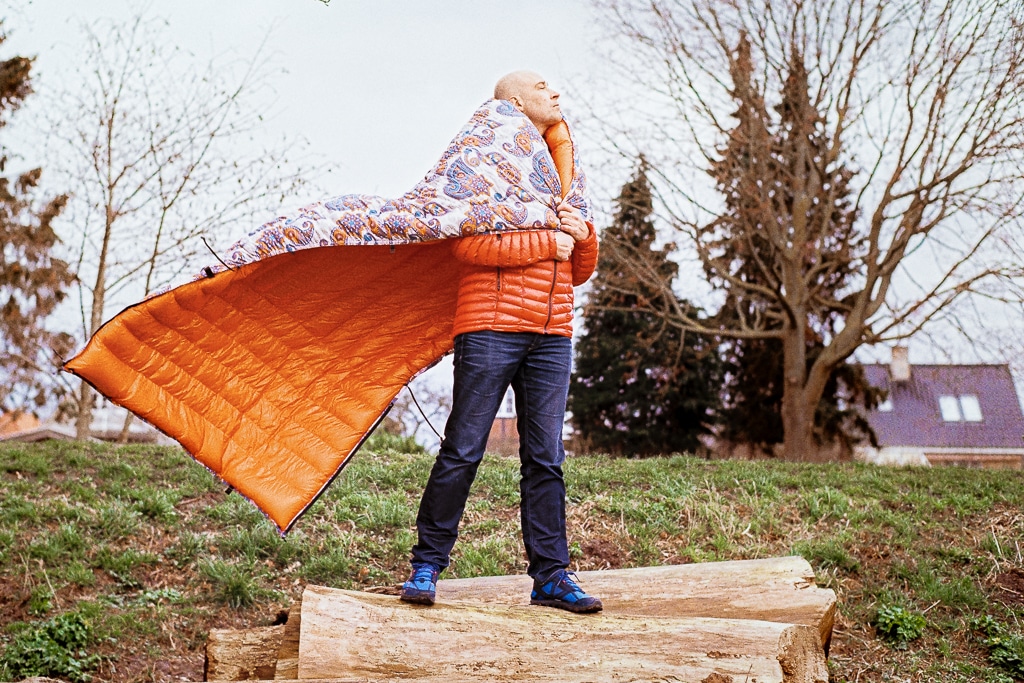
I got a little carried away here and chose the Paisley-1 pattern for the outside and a nice orange for the inside of the quilt – which matches nicely with the orange in the pattern 😉
Having used my Western Mountaineering Astralite quilt on a few hikes, I already learned that the draft collar is very nice thing to have to keep you nice and snug during the night.
The dynamic tension control is supposed to keep the draft to a minimum so I am really looking forward to testing that out.
The weight is a little on the heavy side in the land of UL, but I am a cold sleeper and I have come to realise that a good nights sleep while hiking is alpha and omega.
First impressions
I knew that I made a bold move by ordering that crazy pattern 🙂 And as the weeks went by I started to question my decision 🙂 but when I opened the box and saw my new quilt I was pleasantly surprised – I actually really like the pattern and colours! Lucky me hehe.
The quality of the quilt, the stitching and the loft is outstanding! This is a pro level product and great care is put into making this feel and look top level (or that’s what I presume, I don’t think its possible to just throw some fabric together and have it look and feel this nice)
I can only compare it to my two other sleeping bags/Quilts from Western Mountaineering namely the Western Mountaineering AlpinLite and the Western Mountaineering AstraLite Quilt
Western Mountaineering
Western Mountaineering are one of the big names in Sleeping Bags, and they have a very high standard, so imagine my surprise when I realised that this quilt from UGQ Outdoors probably is at the same level quality and actually exceeds the AstraLite in every aspect. Crazy!
Of course the Western Mountaineering AstraLite is “only” a 26° F (-3° C) quilt and weighs a mere 17.5 oz (450 g) – in the 6’4″ (200 cm) version, so it’s not a surprise that it will feel thinner.
But the fabric on the The UGQ XL-Bandit Quilt just feels better, softer and more like the AlpinLite.
These are just my first impressions, so I have no way of knowing how it will hold out after extensive use – which I will put it through on March 20th when I leave for my Arizona Trail thruhike, and the TGO Challenge.
But right now I am very happy by the result and am pretty confident that it will prove to be an amazing investment.
I will let you know when I get back 🙂

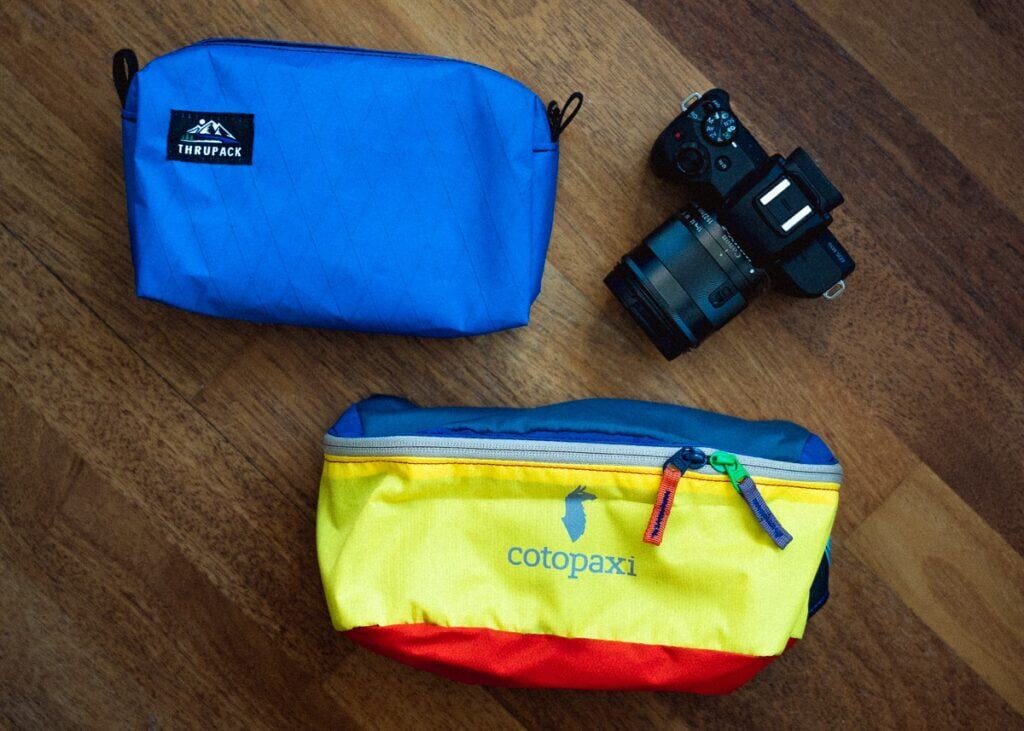
Thrupack Summit Bum Vs. Cotopaxi Bataan Fannypack
As you might have noticed (if you didn’t I will be totally disappointed! what kind of hiker trash are you then?!) I am not going to use my Thrupack Summit Bum for the Kungsleden trail.
In 2018 when I thru-hiked the PCT, I rocked the Thrupack Summit Bum all the way, and absolutely loved it!
At that time I was using a Fujifilm X100F camera which I had in a camera bag attached to the strap of my Osprey Exos pack. So the fanny pack was used for snacks, and my Anker battery pack.
The Thrupack held op pretty fine, but has started to rip in the loop that holds the strap. Maybe because I was overloading the fannypack so it was pulling too hard on the strap.
Just before I went on my Kustleden hike a few months ago I ordered a custom Thrupack to hold my new camera – the Canon EOS M50, which I wanted to use for videos and pictures (instead of using my iPhone X).
Sadly it didn’t arrive in time to bring in on the hike, so I used my original Thrupack once again.
Canon EOS M50
The Canon EOS M50 just about fit into the original thrupack, but it was a huge hassel to take it out and in every time I wanted to use the camera. And sadly, when I got home and picked up my new custom made Thrupack – I realised that I had been a little too conservative on the measurements, so it was still not large enough to hold the camera right 🙁 Totally my own fault!
So I went on google and started to search for fanny packs, to see if there was an option that wasn’t too expensive but still fancy enough to be a statement when worn 🙂
The Cotopaxi Bataan is probably the most fashion statement’ish fanny pack out there and I was instantly in love. Priced decently, and big enough to hold my camera without any problems – AND its not extremely heavy which is usually the problem with “normal” fannypacks.
Thrupack Summit Bum Vs. Cotopaxi Bataan Fannypack
The Thrupack Summit Bum is weighing 99g with the basic strap, and holds 2.5L
The Cotopaxi Bataan is weighing 113g and holds 3L
The Cotopaxi is made of repurposed fabrics and every pack is supposed to be a unique colorway.
It is not water-resistant as the Thrupack, so you have to be aware when it starts to rain.
Both fannypacks are pretty awesome and unless you have to fit a largely camera in the pack I would say that the Thrupack is probably the best choice, Just because you don’t have to worry when it starts to rain (unless its cats and dogs, then you probably have to check to see if any water is getting through).
Also Thrupack is a one person company so supporting him is and other small cottage manufacturers is important!
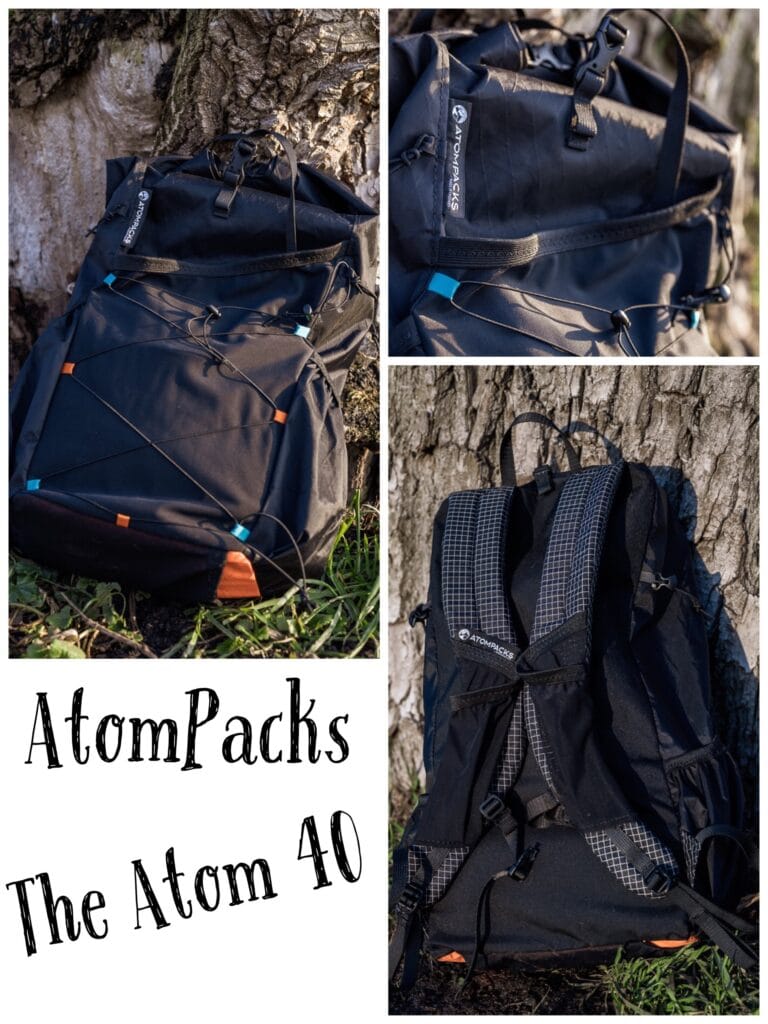
Atom Packs “The Atom 40”
After my thru-hike of the Pacific Crest Trail in 2018, I started to look at other backpacks to find something lighter than my Osprey Exos 55 – which I was very happy with on the trail!
But trying to see if I can lower my base weight, I need to look at my tent, backpack and sleeping system, and the backpack and tent are the 2 easiest ways for me to cut weight as I think quilts are the only way to cut weight on my sleeping bag – and as you might know, I do not like quilts 😉
HMG Southwest | Palante Pack | AtomPacks
The Hyperlite Mountaingear Southwest 3400 was a pack I was pretty interested in when I first started looking into gear for my PCT Thru-hike, so that was the first pack I looked at again to see if that would save me some weight. It would, but only about 500 g (1,1 lbs) which didn’t seem worth it, so I started to look for another solution.
Then I remembered the Palante mafia from the PCT – a term Mister Gigglez came up with after seeing a whole group of hikers, in black, sporting a Palante Pack – and figured that it would be fun to get one of those and just to go all in on the UL hipster train.
Getting one of those packs would save me over 1 Kg (2,2lbs) which would be an awesome weight reduction! But it turns out that it’s not “easy” to get one of those Palante packs.
You need to sign up to their newsletter so you get notified when the packs are available to order, and then you just have to be quick to order it before they are sold out again.
That seemed a little extreme for me, so I looked around for another solution and my hiking buddy from the PCT, Bollocks, suggested Atompacks who also makes very lightweight backpacks.
AtomPacks
Atom Packs is located in the UK, and not only can I get the pack, but I also save import tax as well which is 25% plus some handling at customs. And the Atom 40 is just under 2oz heavier than the Palante V2 so not much of a compromise 🙂
I plan on using the pack on my Coast to coast hike in Sweden (if I can fit my gear in it) at the end of April, and then I might do a review of the pack afterward.
The Atom 40
I bought an Atom Pack “The Atom 40” which a 40L pack that is Ultra Light (UL), weighing only 470g (16.6oz).
This is a frameless pack, so it requires you to go ultralight, else it will be uncomfortable to carry, but I believe that I am getting there 🙂
The pack also has stretchy pockets on the shoulder straps to carry an iPhone, snack or whatever you can fit there. And just as with the Palante Pack, there’s a pouch in the bottom of the pack where you can put for example your food for the day, for easy access.
Here are some pictures to satisfy the gear hungry hikers amongst you 😉